Food styling, at its core, is the arrangement of elements like shape, color, and texture to create a connection with the viewer or express a message.
That cherry pie makes me feel nostalgic for the pies my mother made, or that cocktail looks so refreshing that I can almost taste it.
When styling a cheeseboard, we can tap those same elements to build a powerfully visual — and delicious — scene that captures those personal connections.
The key is to consider how the shape, texture, and color of each ingredient play off each other. As you add elements to the board, ask yourself: does this feel balanced? Is it color heavy in one area? How are ingredients portioned?
Ok, let’s take an example. Putting square crackers next to cubes of cheese will reinforce that shape and feel ‘heavy’ naturally drawing your eye to that part of the scene. On the other hand, long rectangular crackers next to roses of prosciutto will feel more balanced to the viewer.
One more. If everything is placed in equally-sized groups, I won’t be able to focus on anything. But, if I have large pockets of crackers and smaller ones, then each ingredient can stand out to my eye. And we do eat first with our eyes.
How to style a cheeseboard in five steps
Ready to style a cheeseboard? Let’s dig in…
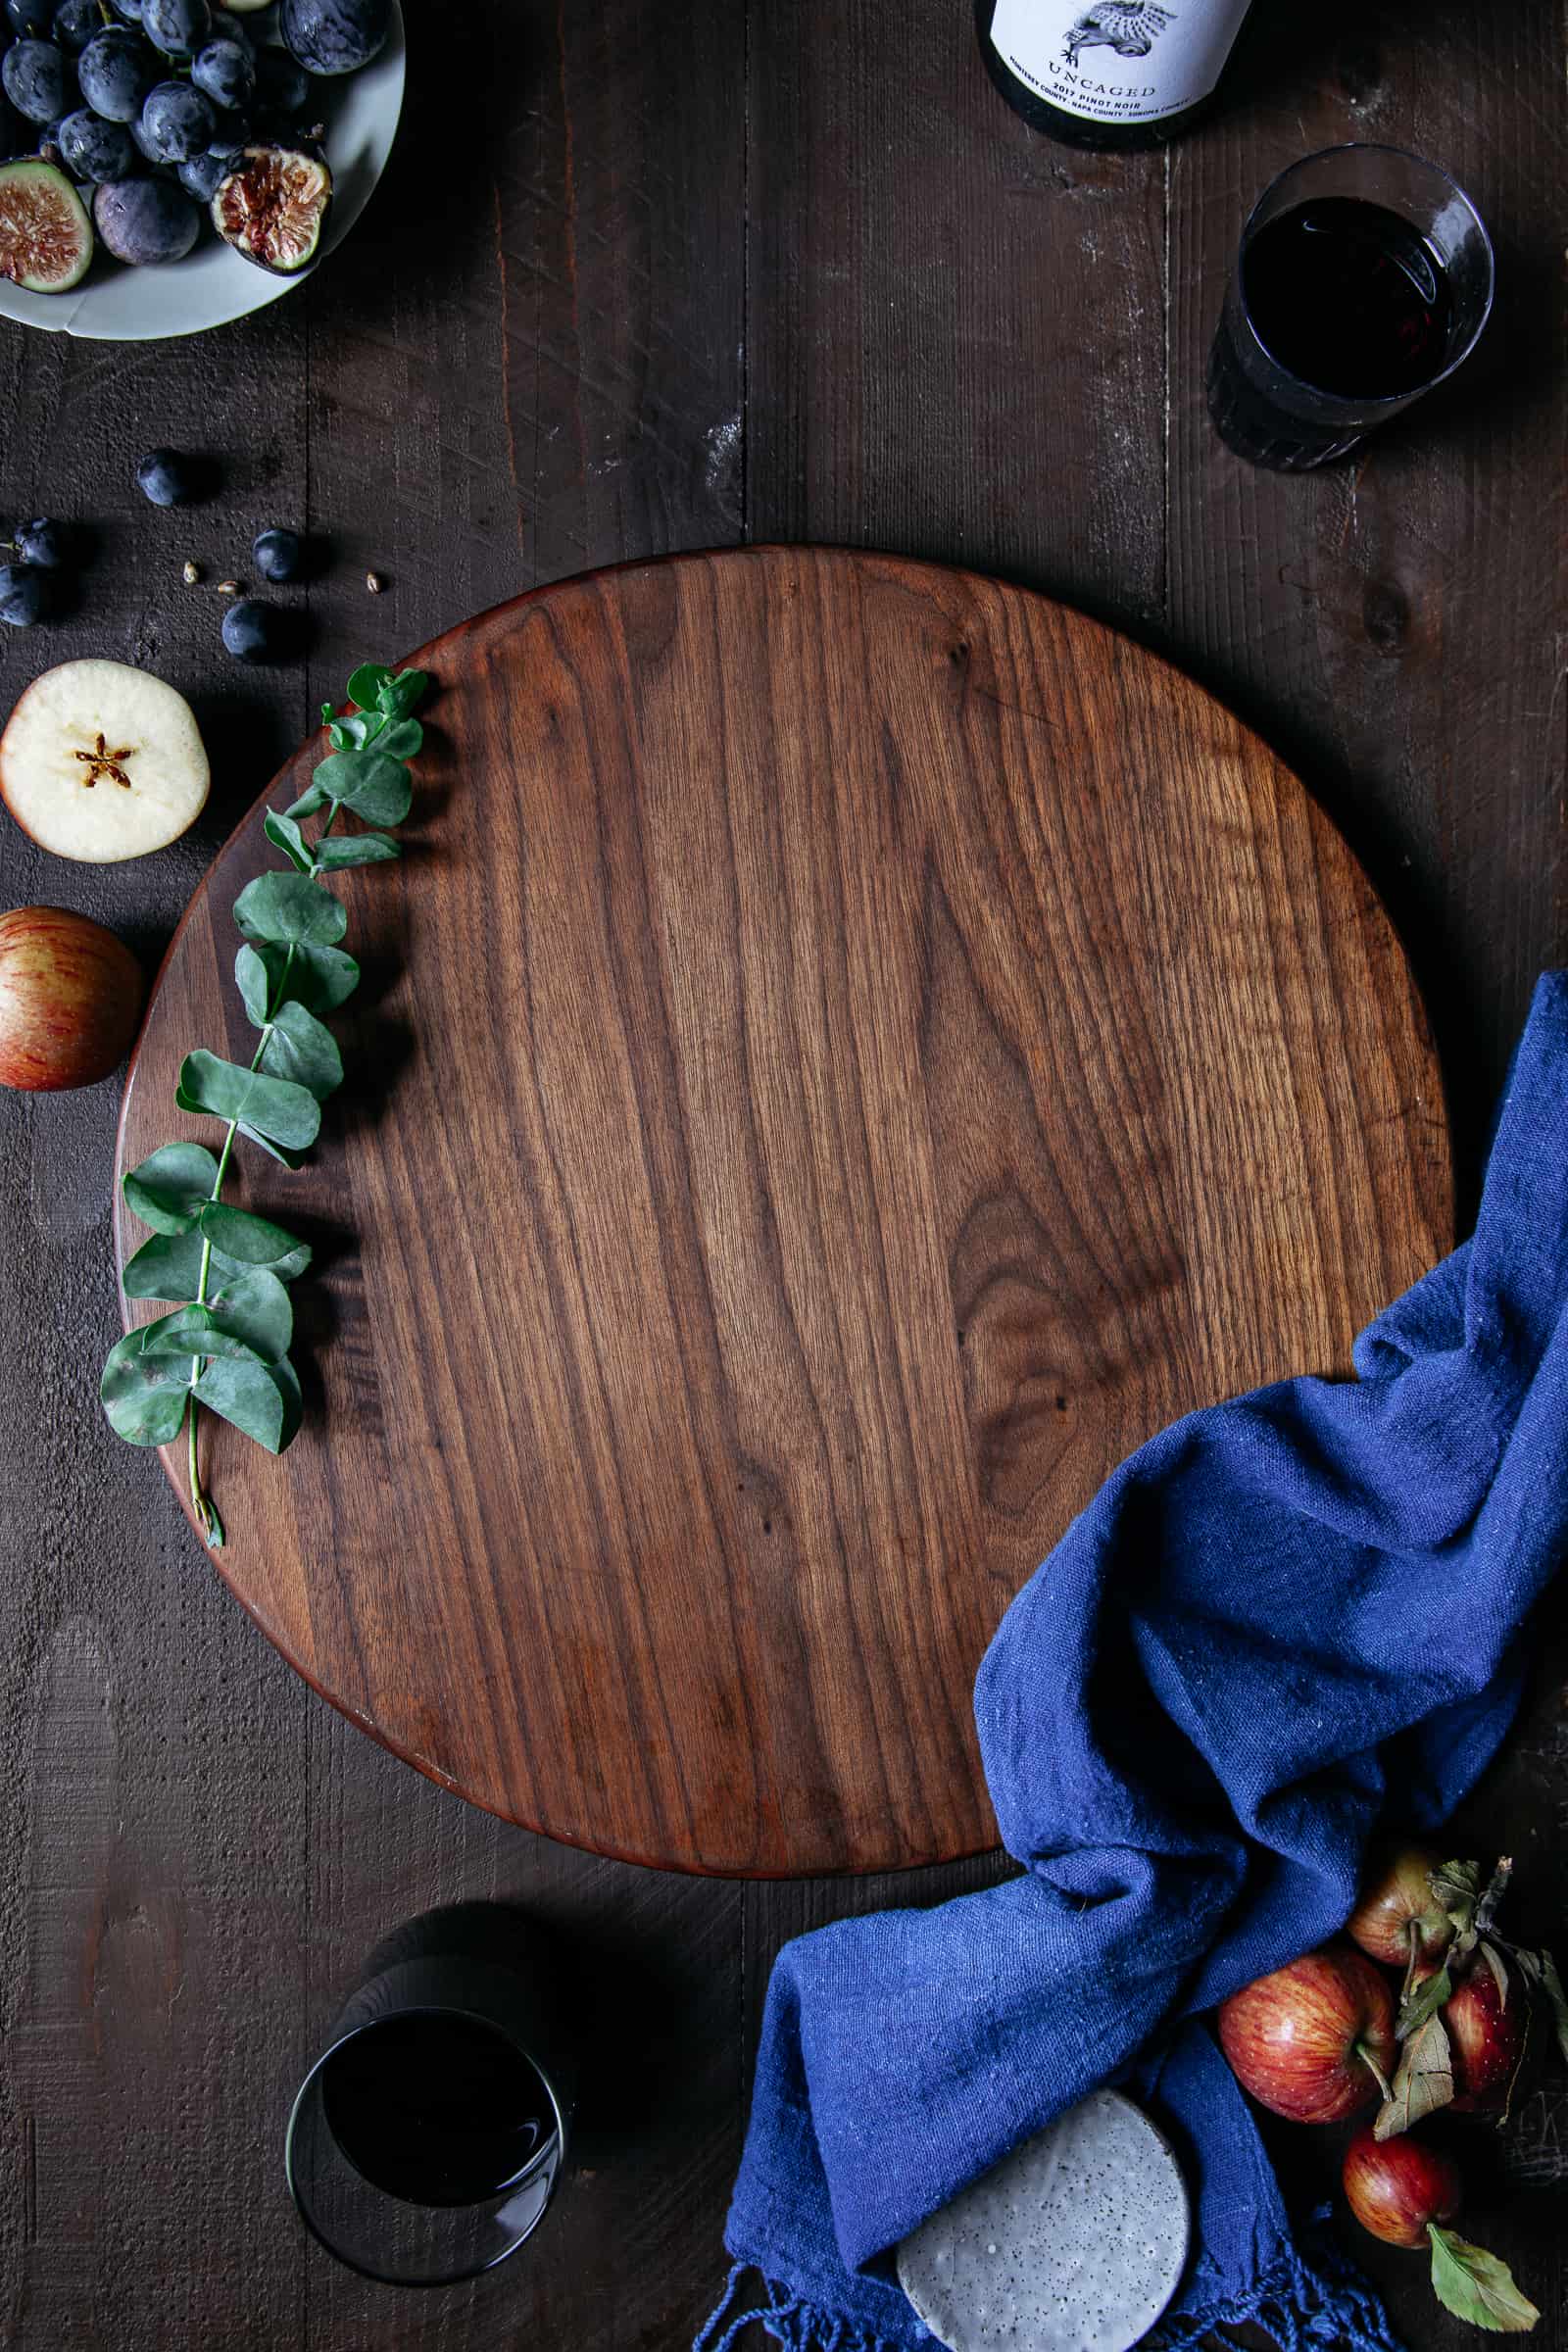
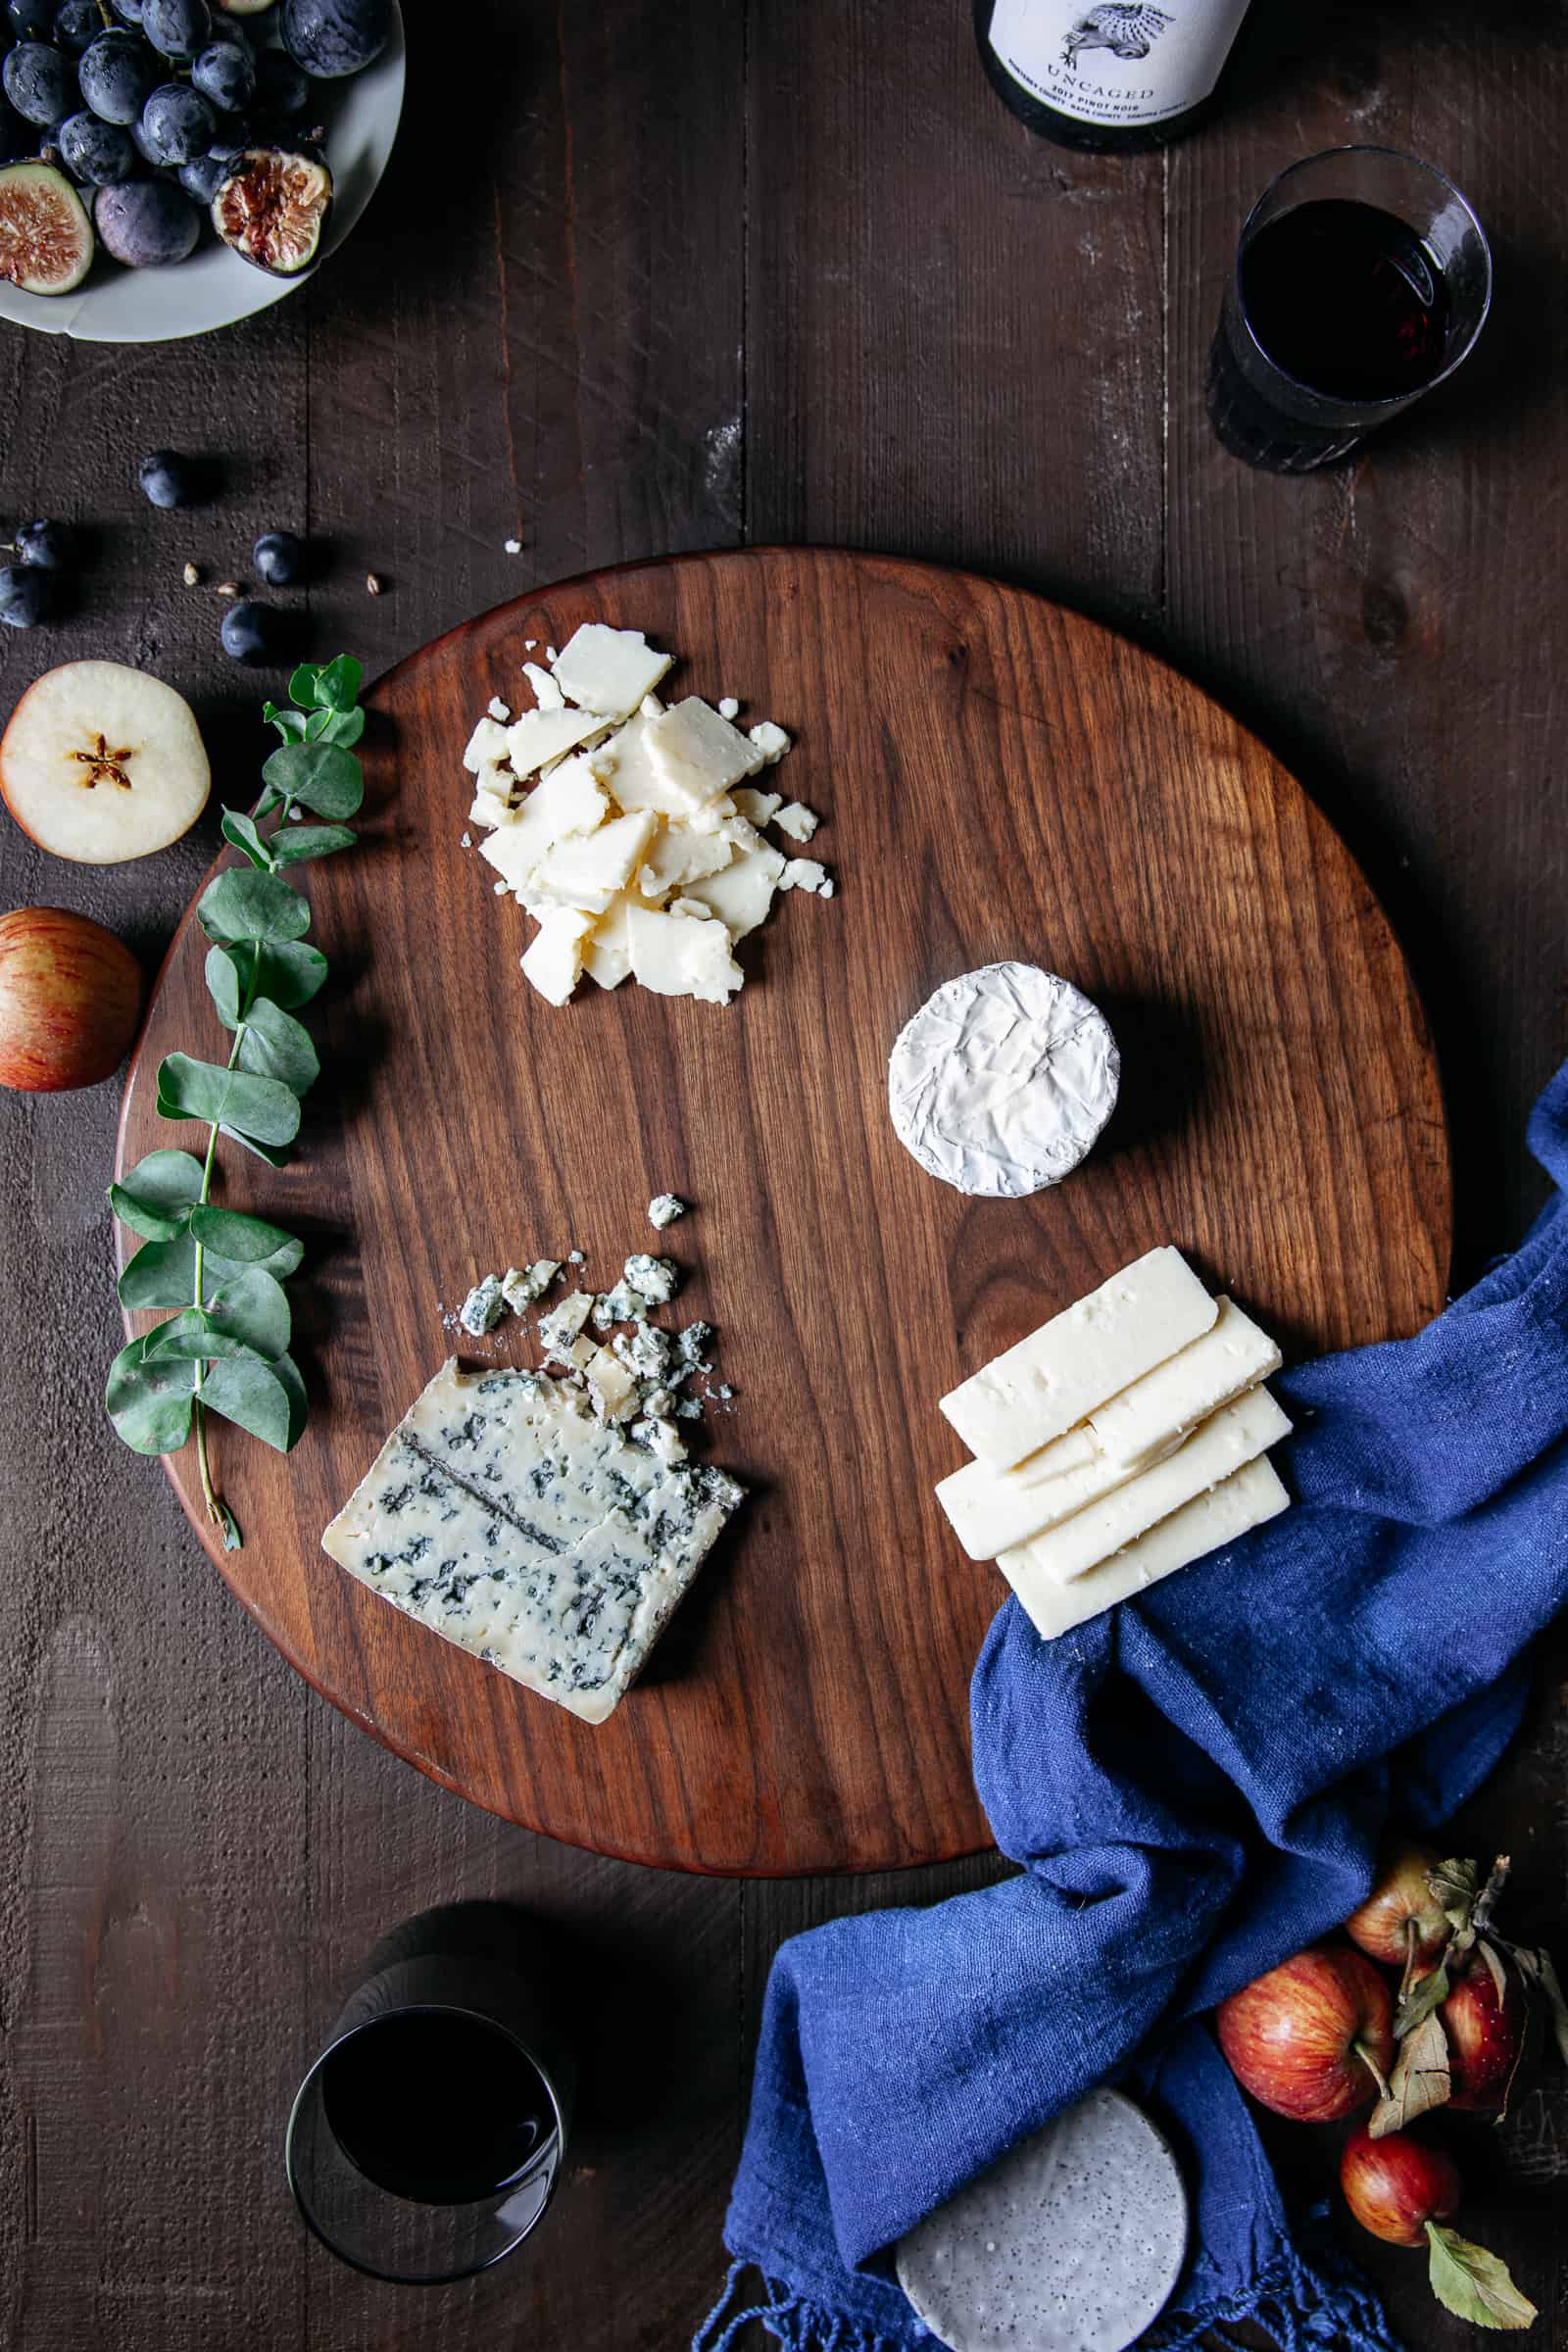
Step 1 — Place the cheese
— Start with the largest items and work backwards to create ‘anchor’ points to style the rest of the cheeseboard
— Use 3 to 4 different types of cheese — hard and soft — or 2 to 3 for smaller boards to play with different shapes, colors and textures
— Balance shape, size and texture — hard against soft, round against rectangular, sliced against crumbled
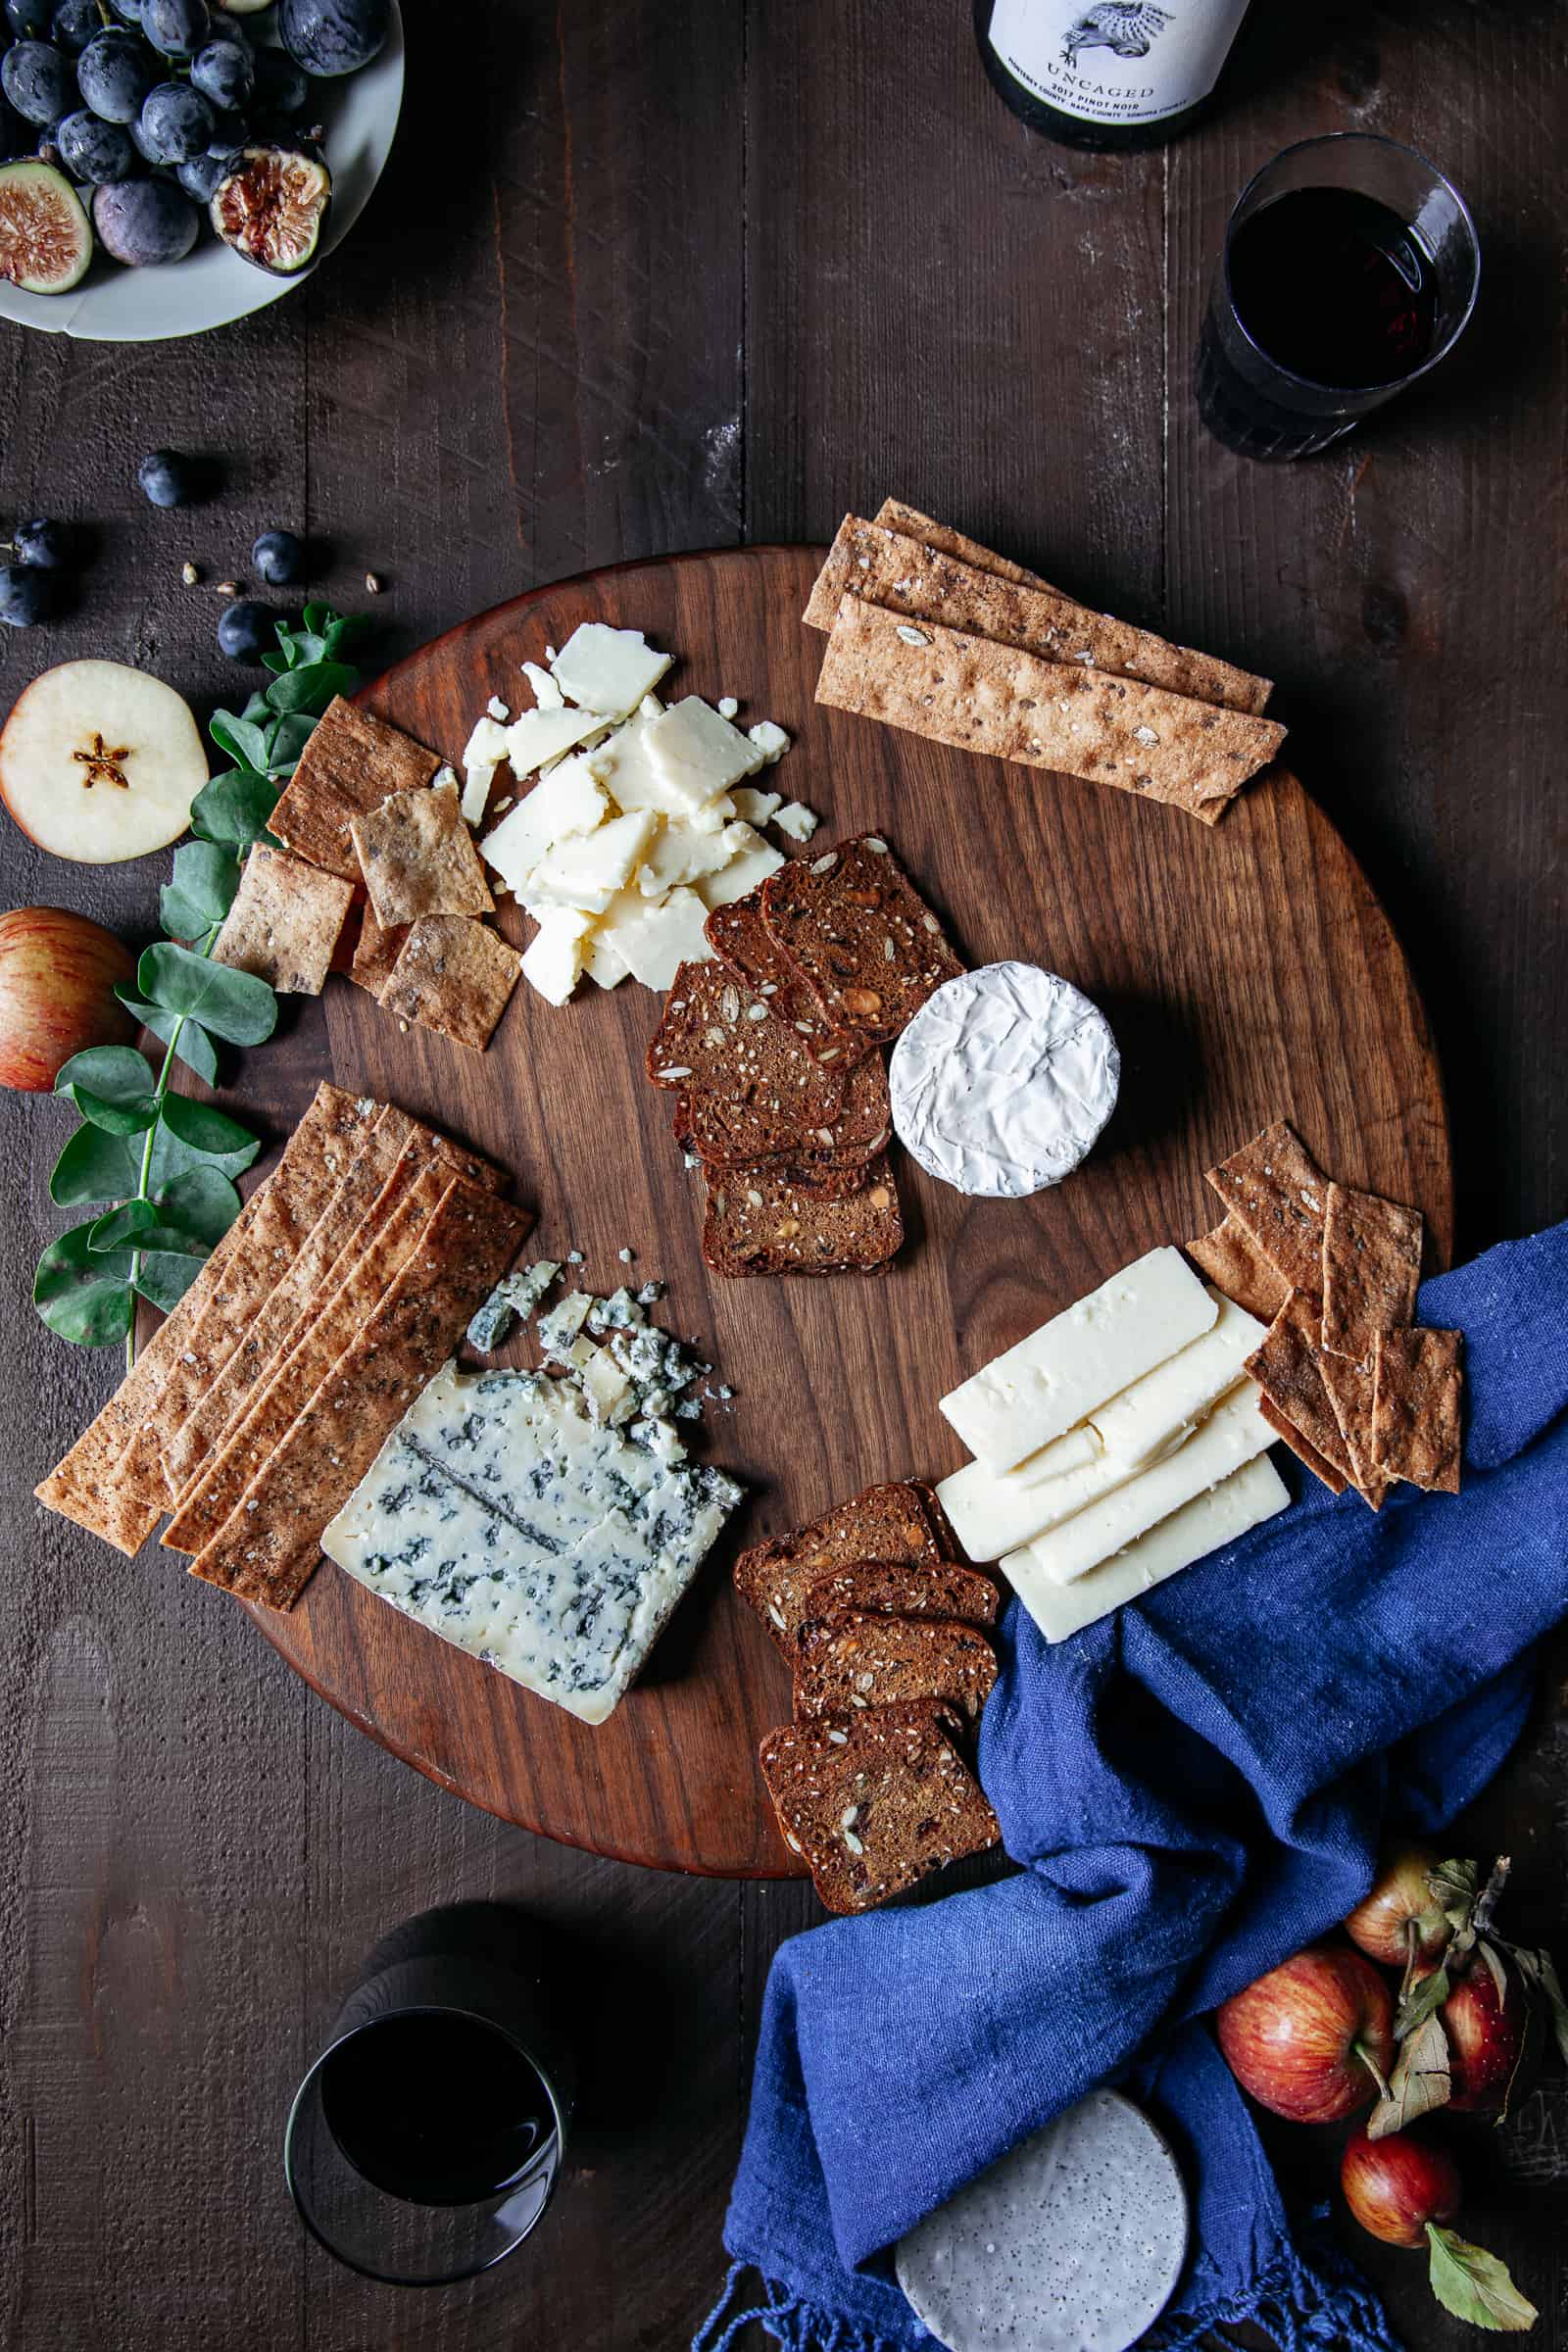
Step 2 — Add the crackers
— Choose crackers that are different shapes, sizes, colors, and textures
— Arrange crackers in different ways fanned, stacked, shingled, or piled
— But, arrange the same type of cracker in the same way to create visual repetition
— Play up/against the shape of the board — fan crackers around a circular edge or let rectangular crackers hang off
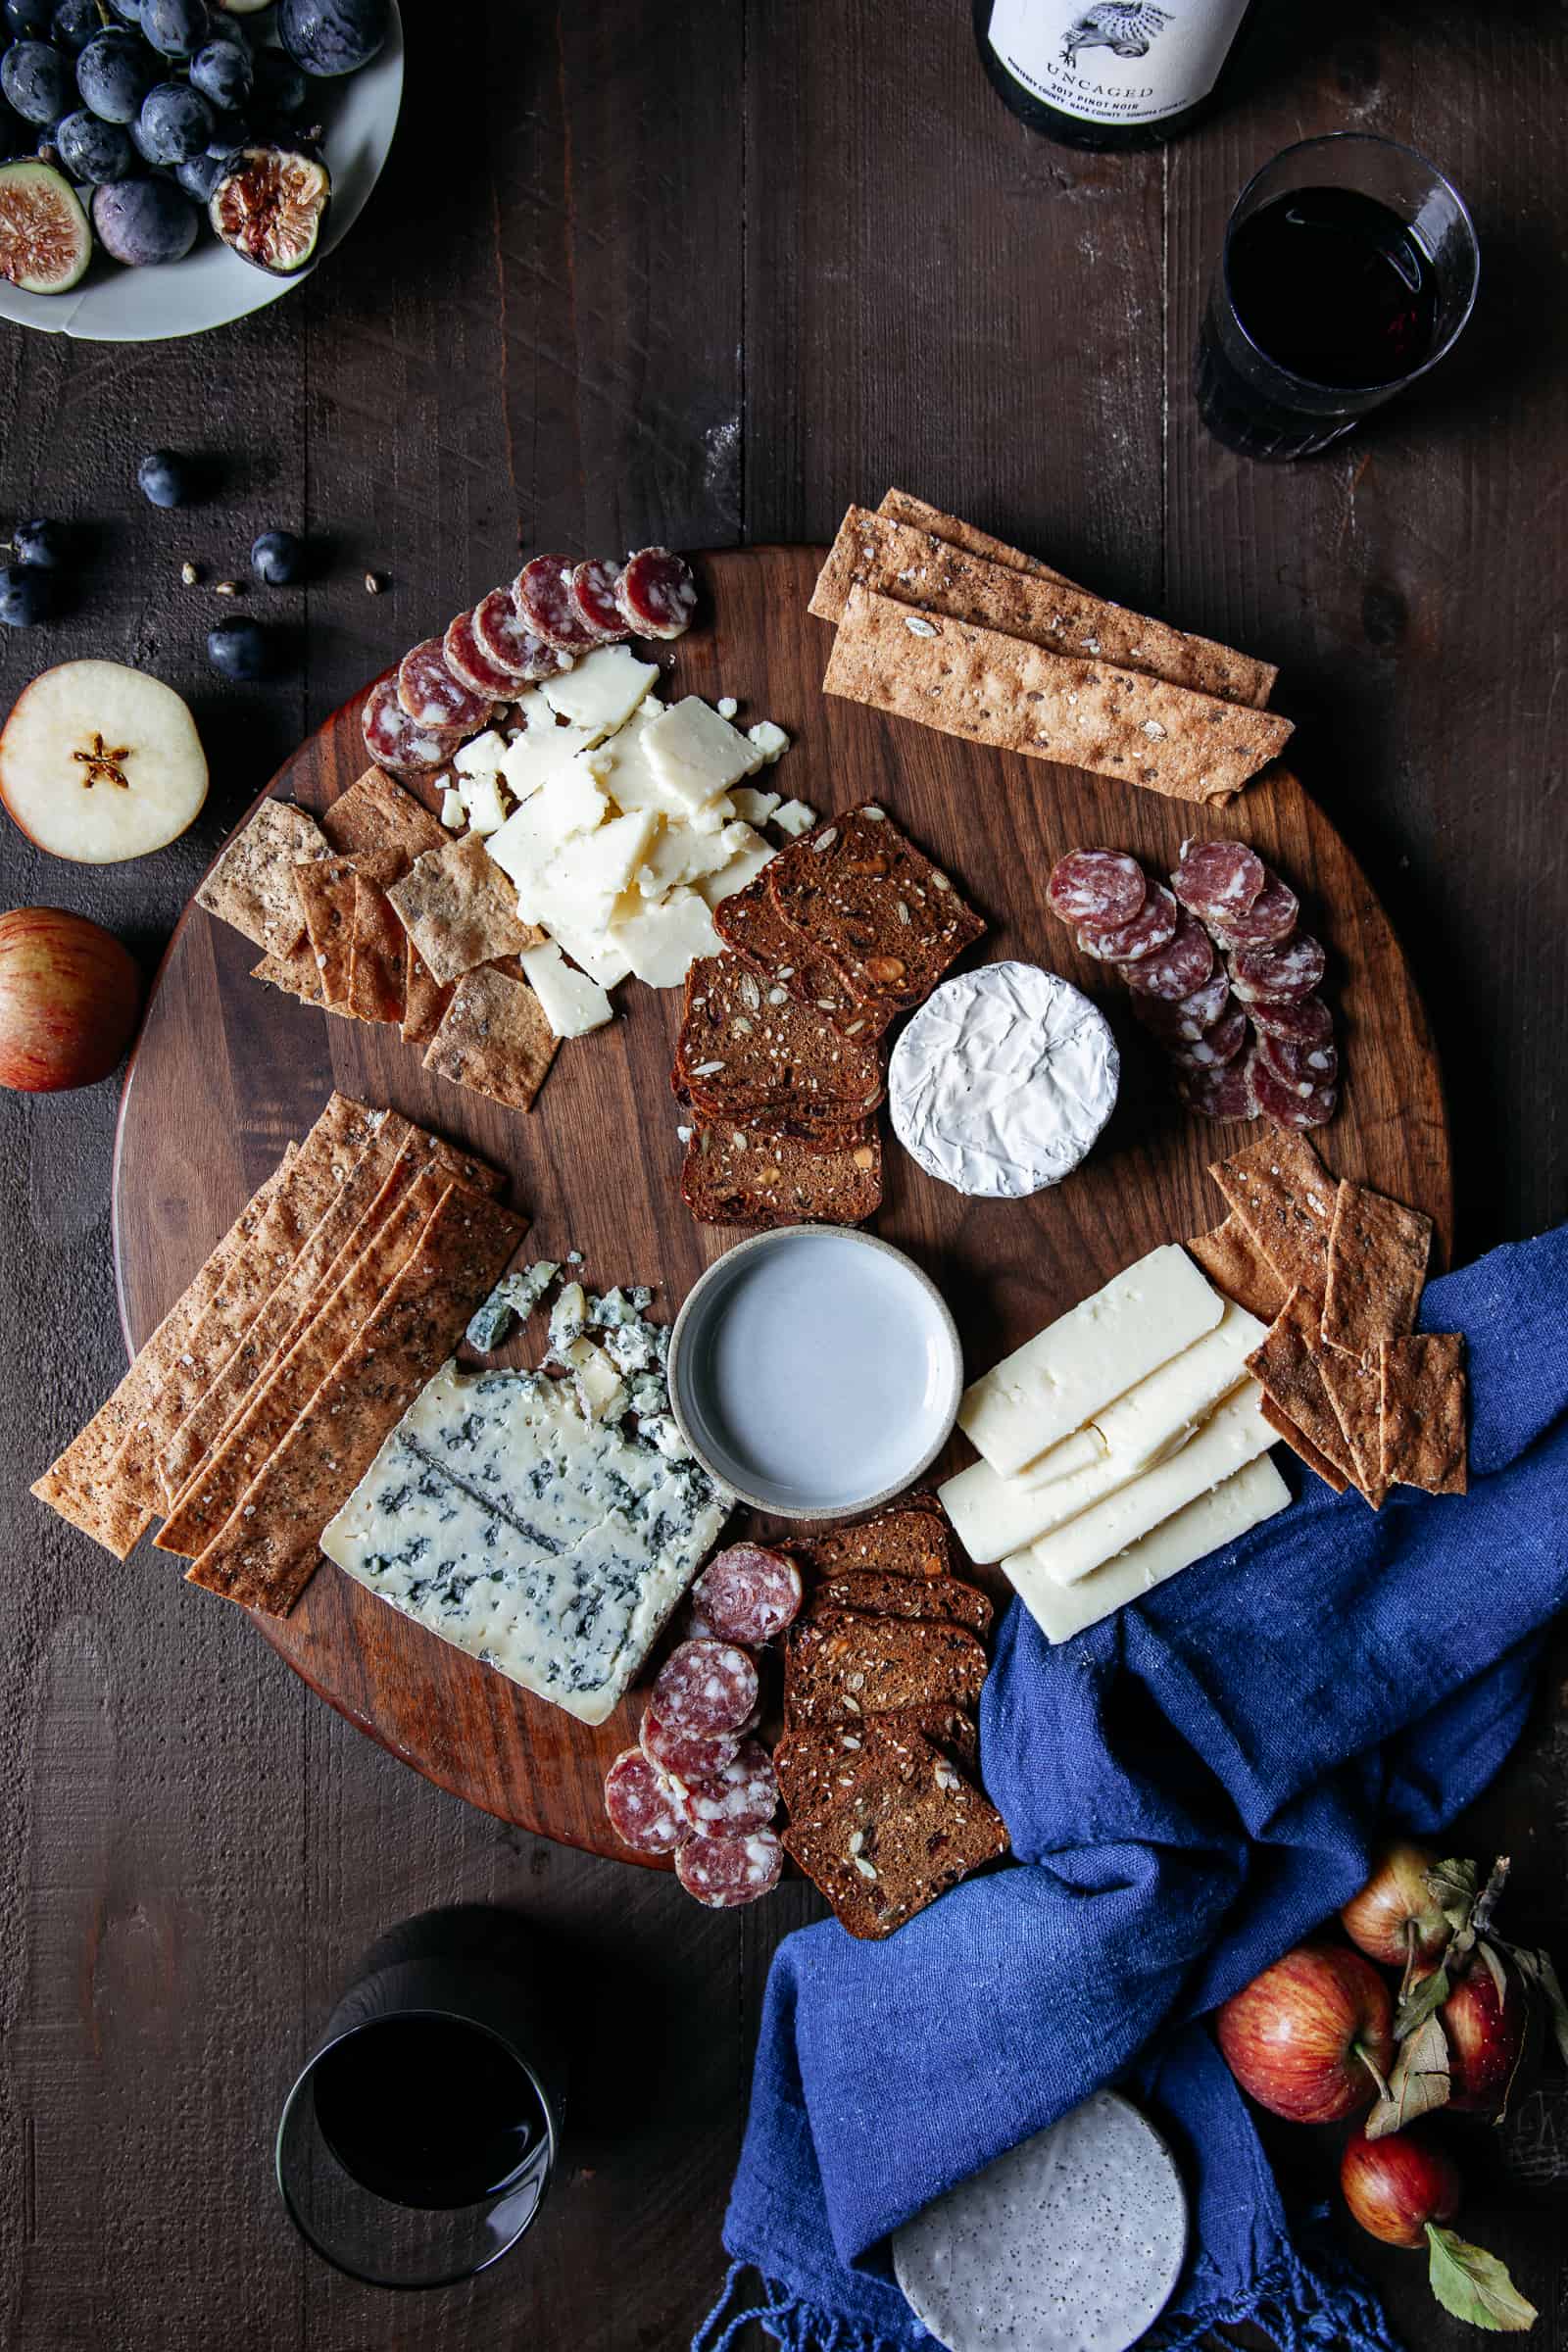
Step 3 — We have the MEATS
— Arrange meats in smaller groups and multiple spots OR snake one or two types of meats through the center of the board in an s-shape to create strong visual symmetry
— Place each group of meat in a spot that contrasts with the group next to it in color, shape or texture
— A safe bet is to always place meat next to cheese
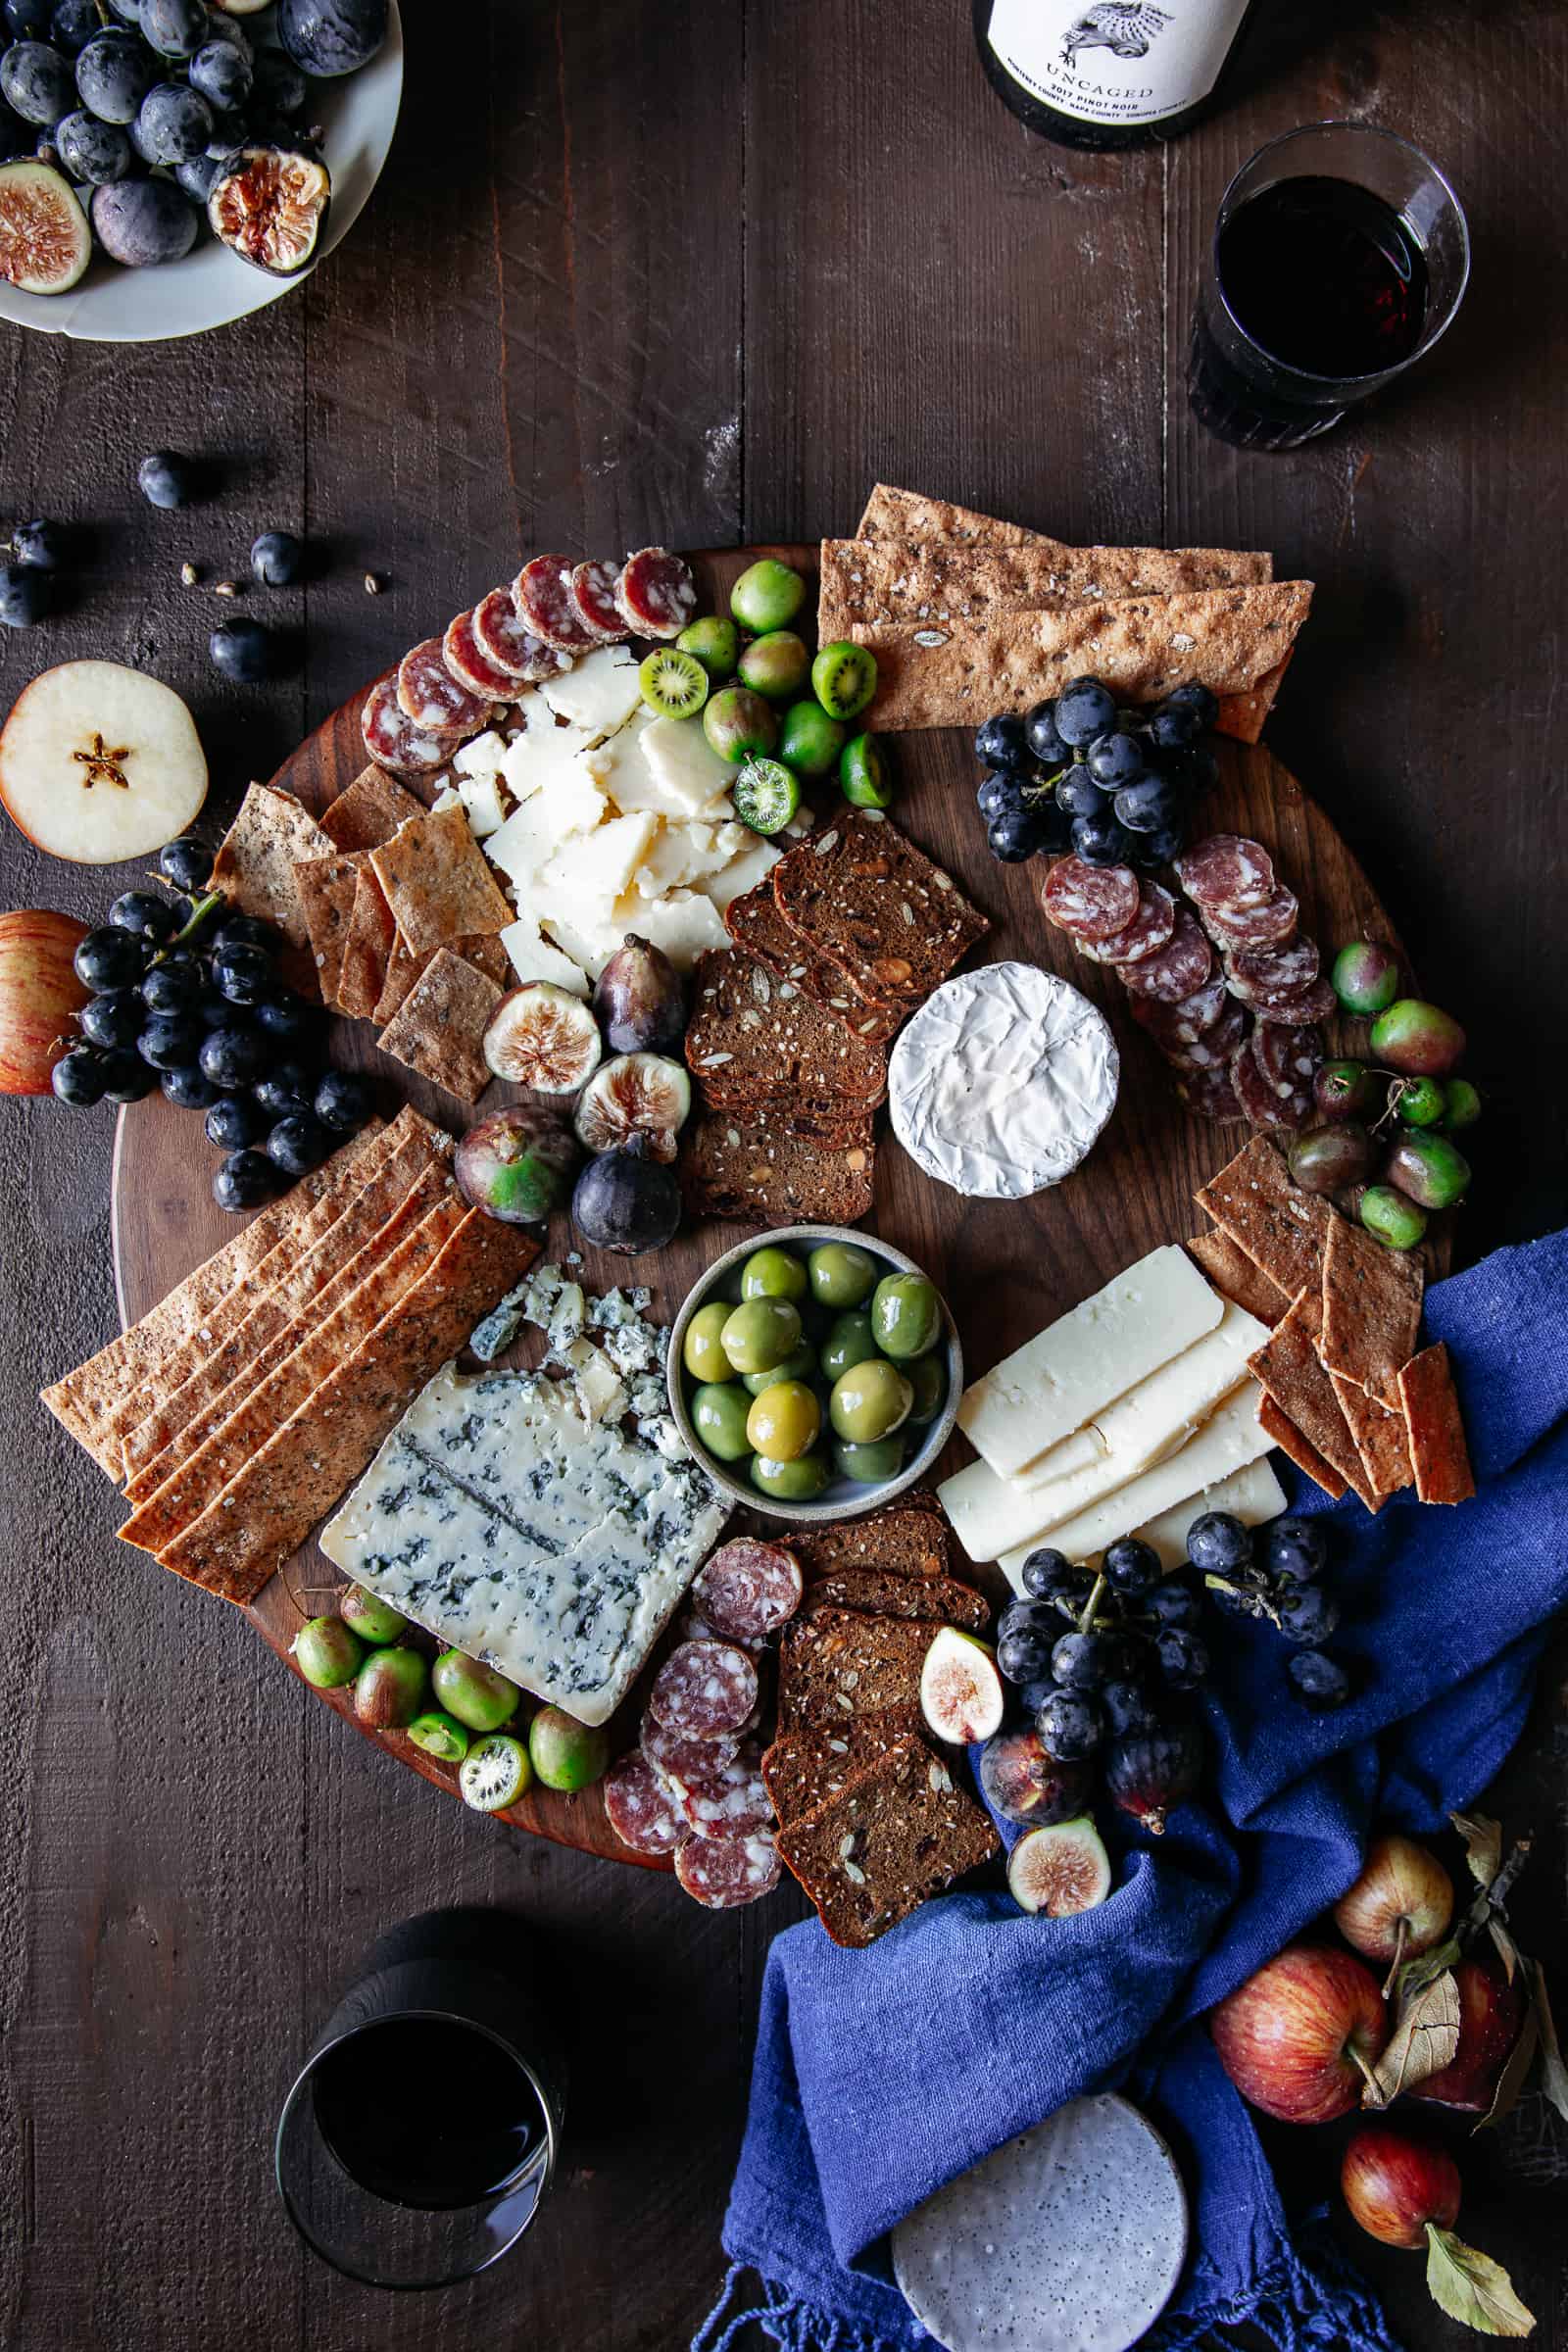
Step 4 — Accoutrements, it’s French for delicious
— Hone in on your board’s overall color story with all of those delicious accoutrements
— Cheese and meat tend towards a neutral/warm color palette
— Choose 1 to 3 other colors to create a harmonious color story
— Make sure at least one of the colors really POPs against the others like bright green olives against the warmer crackers
— Feel free to use a variety of ingredients — fruits, jams, pickles and olives

Step 5 — Take it home or: How I Learned to Stop Worrying and Love Fillers
— Fill in any remaining gaps with small nuts or seeds — not only are they delicious they they connect everything and create movement
— Be sure to to fully fill your board to create a bountiful, abundant look
— Add a little va va voom with a few sprigs of fresh herbs or scattering of flowers petals
— The repeating colors, shapes and textures of the styled cheeseboard should naturally guide your eye around the board
Have any questions on how to style the perfect cheeseboard? Let me know in the comments below!

Lynne Collins says
My family, me and the ex and 3 sons, have always called this Picnic Dinner, i.e., “What’s for dinner? Picnic!”: cheeses (always Brie), fruits (always pear), olives, avo, tomato, artichoke hearts!!, alternative (protein based) meats (wayback, prosciutto & salami), and a baguette or two. One of our favorite meals, other than Breakfast for Dinner 😉
Evan Kalman says
I love that! Fully supportive of picnic dinner and breakfast for dinner! And, tacos. Always tacos 🙂
Lynne B Collins says
Yep, tacos! tho I prefer cheese quesadillas with whatev thrown on top (I like them flat) especially spinach or mushrooms. They’re so pretty, ha!
Connie says
My cheese boards never look that nice but I tend to make them on a paper plate at midnight when I have been too busy to eat all day.
Evan Kalman says
I feel that!!
Lynne B Collins says
On a side note, sometimes, rather than the ‘Cheeseboard’, on special occasions, we display the spread in my non-official Cherry Blossom collection of bowls, plates, vases, platters… We like to laugh at the baguettes or wine in the milk pitcher!!